Tuesday, May 28, 2013

The Lace Journey Ends......And Some Art With Friends

Just before the start of the Memorial Day Weekend, I received Marita's luscious lace journal from Elena, and spent a good part of those days working on it.  Marita's is the last one I had to create for, and soon I'll be getting my own back.  I've loved being a part of this group, and fully intend to continue to incorporate fabric and lace into my projects.

Marita's theme included vintage faces, hankies, and the colors ivory, ecru, and black.  In anticipation, I set aside all the elements I thought might work, and selected a focal image.  So when I actually had the book in my hands, putting together my spread came very easily.  Don't you love when that happens?


You can see I had plenty of lace in the right colors; the pocket for the "hankies" is just an oval doily cut in half.  Since I didn't have a hanky that went well with the colors Marita requested, I made a faux one with black and white netting.


There is a bit of batting under the image to make it puff up.  I went over her headband and earrings with flat backed pearls and crystals; the gold "chains" on the earrings are lines of Ranger's Liquid Pearls.


The back is simply decorated with lace and some beaded trim.


As for the "art with friends" portion of the title.....I recently got together for a play date with Pat and Teri.  After a wonderful Greek dinner we headed for Teri's place where we each brought a project.  Pat was up first, and we received these:


What to do with a wine glass, a paper template, and an electric votive candle?


Pop in the candle, then using the template, cut out a skirt.  I used a gelli plate page that my pal Lillian gave me when we were at Keys4Art in March.  A dab of glue holds it together.  I used decorative scissors when I cut the top and bottom, and a tiny flower punch to make some holes so the light would shine through.  I also added the beaded trim because.....well, because Pat thought it was a great idea, and it was!


Pardon the pun, but Chinese take out food takes on a whole new light when consumed with this little beauty on the table.
 
Teri's project was altering old photos.  She picked up a huge supply at a second hand store.


They do have to be traditionally developed photos, not computer printed ones.  It's all about the coating.  First we submerged them in water for a few minutes, then dried them off, and proceded to scratch and sand them.  On some I altered only sections, on some the whole photo.  It's a very cool way to isolate one area and then create an entirely new picture surrounding it.  After scratching and sanding, we added paint, and then some stamping.  Here are three I've completed.  I like this!
 
 
You can't see the original photo at all on this one:


I left the stones untouched; I think it looks like seagrass
and weeds are growing out of water:


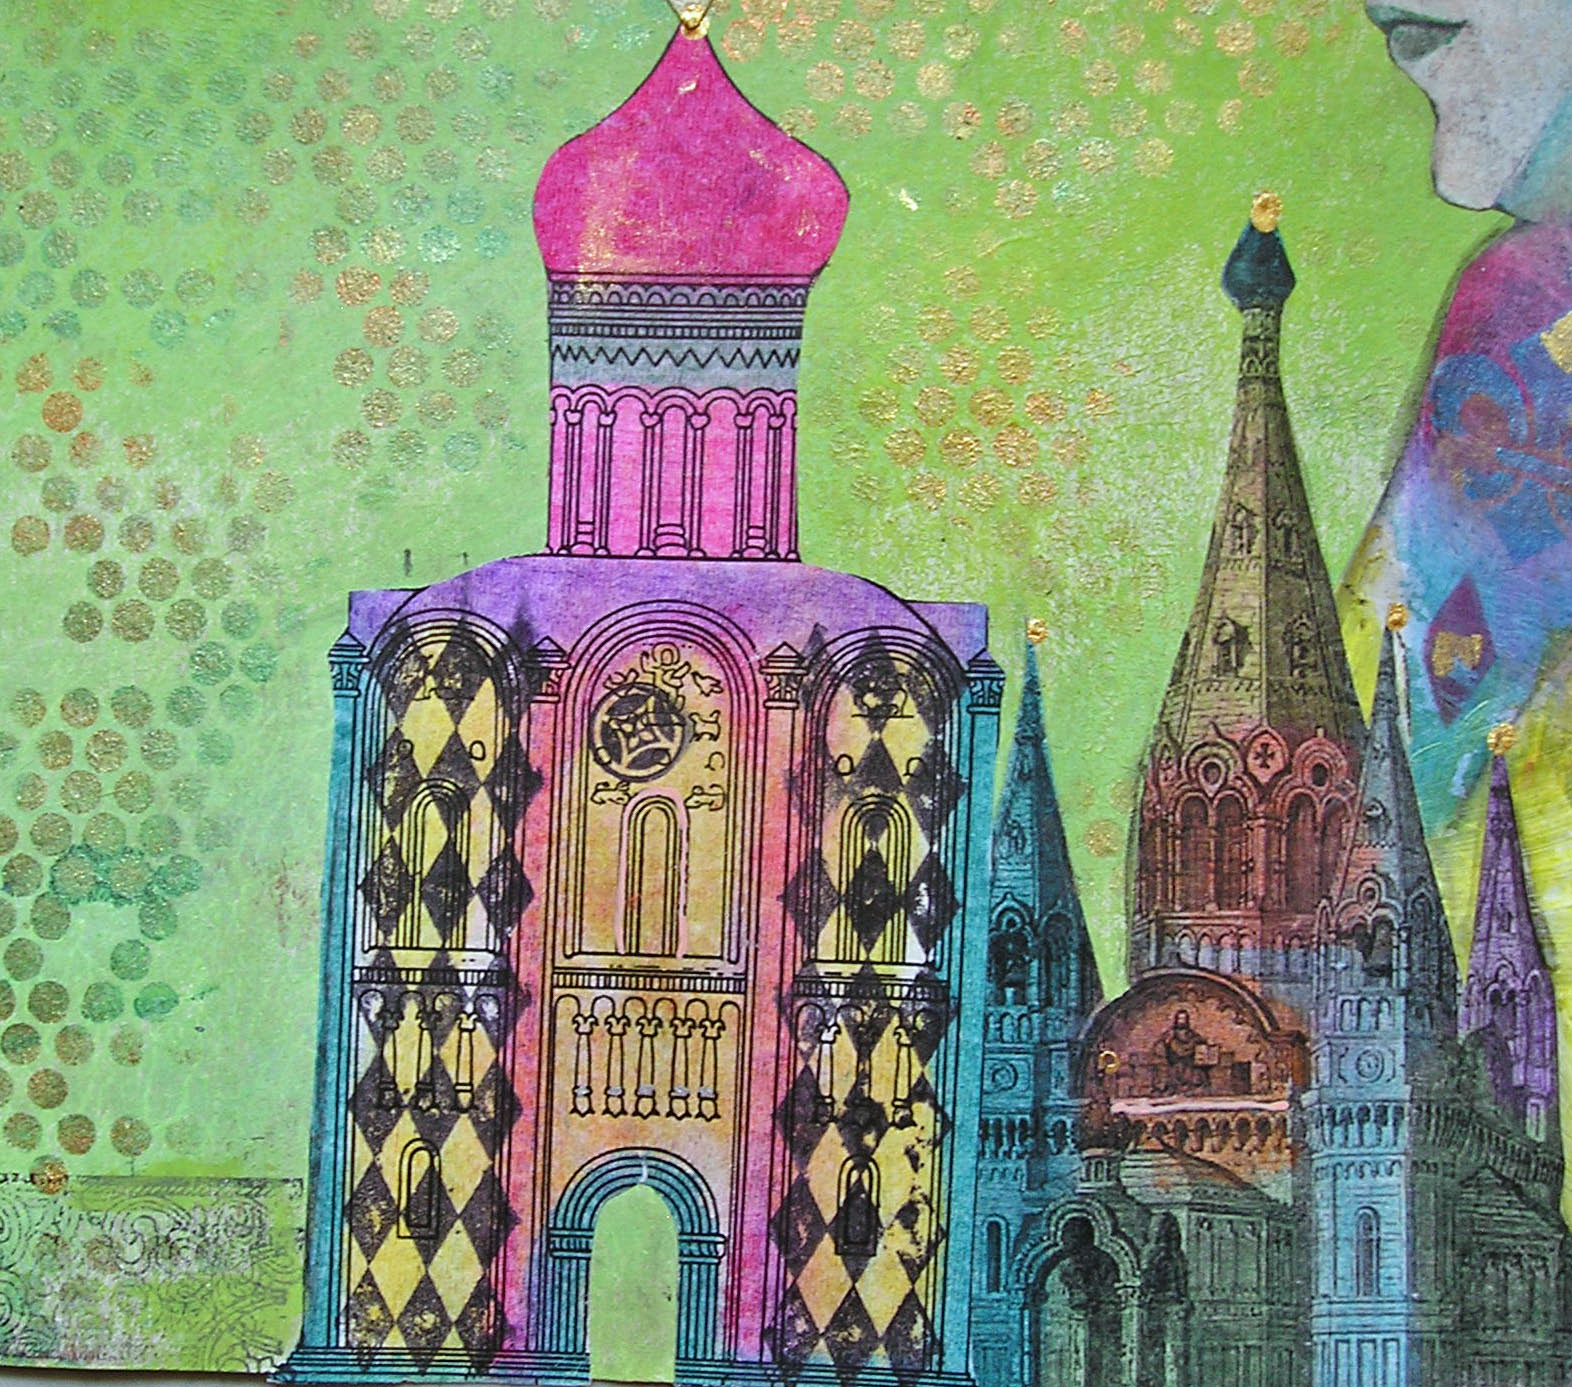
On this one the wall was unaltered, and the cityscape
stamped over it.


My project was a birthday card using the wrapped package from Tim Holtz's Birthday Blueprint set.  I've seen a few very similar cards in the blogosphere, so I'm not taking any credit for the design.  I have no idea who originally came up with the idea of paper piecing, but it sure wasn't me.  Coupled with pop dots, it does make for a wonderfully dimensional card.


Wednesday, May 22, 2013

Back to Russia

How Sue Acquired A Russian Ancestor
 
 
Clearly, I still have the desire to incorporate images of Russia into my art.  When I received Sue's Vintage Ancestors book this week, I knew immediately where her next ancestor would come from.
 
Sue structured her book a bit like a mystery (a very cool idea), setting her main character, Alice, off on a world wide journey to locate distant relatives.  Each one had a key (and Sue asked that we all use a key somewhere on our pages), and one of Alice's quests was to find the key that matched the one she herself possessed.
 
So naturally, I sent Alice to Russia, although an additional trip to Paris was necessary.  And I just had to throw in some Russian royalty as well as a rather emphatic nod toward my own Jewish Russian roots.  I knew all those years of reading mysteries would come in handy some day.
 
 
Very much under the infuence of Lynne Perrella, most of the coloring I did was with my Portfolio pastels.  The church which is furthest in the background is a drawing of the New Russian Orthodox Church in Paris.  Overlaid are some drawings of Russian churches as well as a few of the stamps I carved myself.  They have all been embellished with sparkly things, German scrap, and lots of doodling with my glaze pens.


The young beauty is Natalia, widow of Alice's distant cousin, Grand Duke Dimitri.  Below her photo is a pocket containing the explanation of all this, and to her left, the key she inherited from the late Duke.


After taking pictures of my pages, I decided that the litte faux Faberge egg atop the key needed more bling, so I added some.  Much more authentic now, LOL.


And here is the story of Natalia and Dimitri. 


I do love the challenge of inventing ancestors for my friends!


Friday, May 17, 2013

Ornate Doors and Gates

That is the theme Pam chose for her book in the round robin happening in the Kindred Souls group.  The book itself is a masterpiece of creativity and paper engineering.  So much so, that each artist receiving it reported being at least a little intimidated.  Yep, me too.  We all wanted our pages to be as wonderful as the book Pam created.  So far, I think we've succeeded.  Just hope Pam agrees. :)

For this project, we are only doing one page, with our information and minor decoration on the back.
Here we go:


The image of the door comes from Graphics Fairy, a great site for free images, mostly vintage.  It was printed on plain copy paper, glued to cardboard, and enhanced with some ink, embossing powder, and a little metal on the top of the arch.  It is attached to the base with a combination of adhesive and brads, and it's a pretty strong connection.


The background is just a decorative napkin.  Some floral stamps were used to add some flowers from the background onto the door, and then a few very small Prima flowers with dots of stickles in the center finished that off.


The door does open.  I used one of those little photo tabs to hold it closed.


So, what lies beyond this garden door?  Why, a garden gate to a secret garden, that's what.


This door/gate is made of thin wood, but I covered it with micaceous iron oxide paint so it looks like old metal. I don't have the packaging it came in, so am not 100% sure of its origin, but I THINK I found it at Navel Jelly.   My apologies if I'm wrong.  So hard to keep track of all the supplies, you know.  The garden beyond is paint on deli paper;  the flowers were "painted" with both glaze and souffle pens.
 
Onto the back:


The background is some decorative paper from Stampin' Up that I've had for ages.  I stamped the LaBlanche garden gate stamp right over the text.  The little girl is another great image from Graphics Fairy, and I gave her some extra flowers to hold.  My personal information will go on this page.


Monday, May 13, 2013

Far Away Places

For the third May in a row I traveled to Connecticut for one of my favorite activities......taking a workshop with the fabulous Lynne Perrella.  This year was better than ever, for two reasons:  co-teaching with Lynne was Michelle Ward, and I was able to share the experience with three of my favorite peeps, Cheryl, Pat, and Teri.  Oh, I should have said there were three reaons this year was the best:  Cheryl drove, so we car-less city folk didn't have to do the Metro-North -(with a train change)-to-Wassaic-then-get-a-cab-to-the-hotel-with-two-tons-of-art-supplies routine.

The theme was Far Away Places, and we spent many hours in the weeks preceding the workshop deciding on our places, doing research, and gathering images and supplies. 

Of course I brought my camera; I even brought extra batteries.  Did I take any photos?  Not a one.  With my table full of materials and my hands full of paint and gesso, pulling out the camera was the last thing on my mind.  Luckily, Michelle posted a few nice snaps on her blog.  Check it out.  It also has pictures of both Lynne's and Michelle's sample pieces, a beautiful photo of Lynne and Michelle, and a group shot, which I have swiped here:


The workshop was held, as usual, at the lovely Interlaken Resort and Conference Center in Lakeville,  where they treat us very well, providing breakfast, lunch, day-long beverages and afternoon snacks.  Here are a few photos of the grounds taken at past workshops:


Actually, the grounds were even more beautiful and full of flowers this year.
 
I decided on Russia as my far away place.  My grandparents came from there, and though their experiences both pre and post revolution were not exactly a day at the beach, it is where they came from, and I wanted to include that in my work.
 
On day one we did a project with Michelle.  She showed us how to make cuts in folded paper to create windows and shapes that either pop out or recede.  I loved it!  Here is that piece (all photos taken at home):
When folded, it looks like a book, and this would be the cover:


The cover with the windows opened:
 
The back cover:


The piece opened and standing:
 
Opened and lying flat:
 
Details:

 
The back:


On the second day, we did a long banner with Lynne.  While Michelle largely uses paint as her color source, Lynne is all about the Portfolio water soluble oil pastels.  I love them too. 


Day three was a project with Lynne and Michelle.  First they each demonstrated the way they approach making a grid design, and then we set out to do our own version.  My grid was made up of two inch squares of various papers, many left over from the previous days.  Although much of the grid wound up being covered by the focal image and stenciling, enough of it is evident and makes an interesting base for what came afterwards.


We were told that Lynne and Michelle are already talking about what they want to do next year.  Sign me up!